How To Save And Use Passkeys
Save passkeys from websites directly to your PearPass vault and use them to sign in.
Save a passkey
Start passkey creation on the website
On a website that supports passkeys, start the passkey setup flow. The PearPass extension dialog opens automatically.
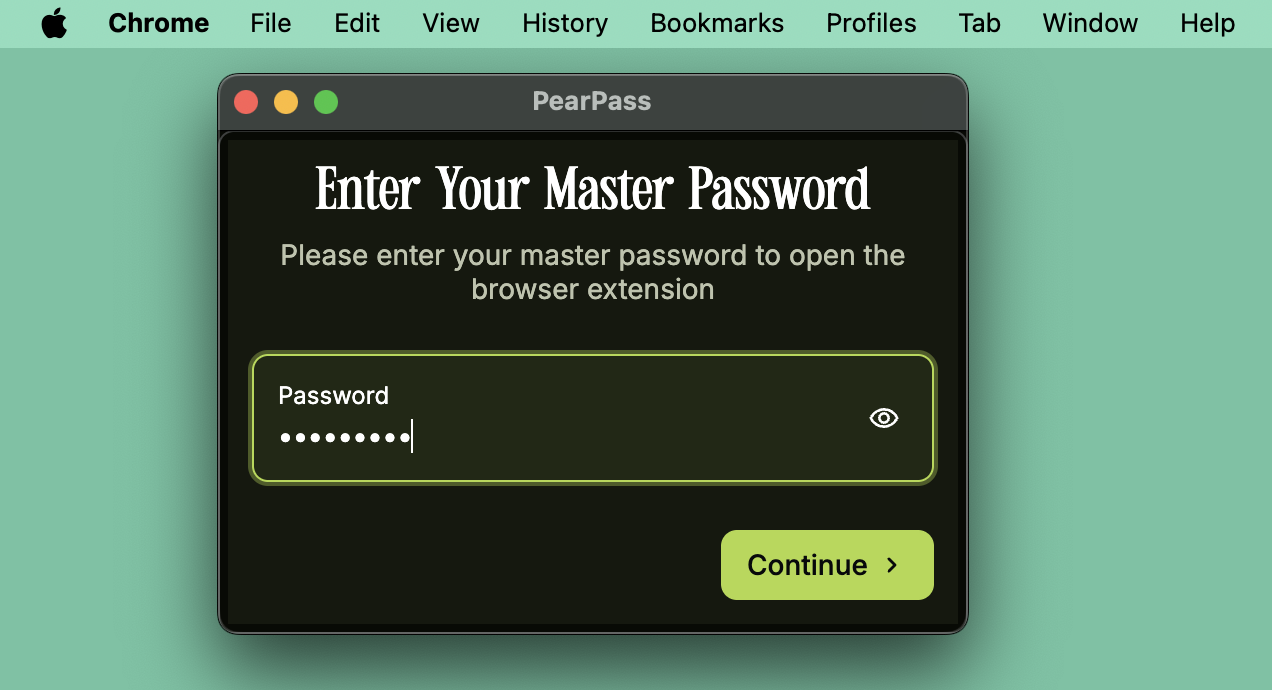
Enter your master password
Enter your master password and click Continue.
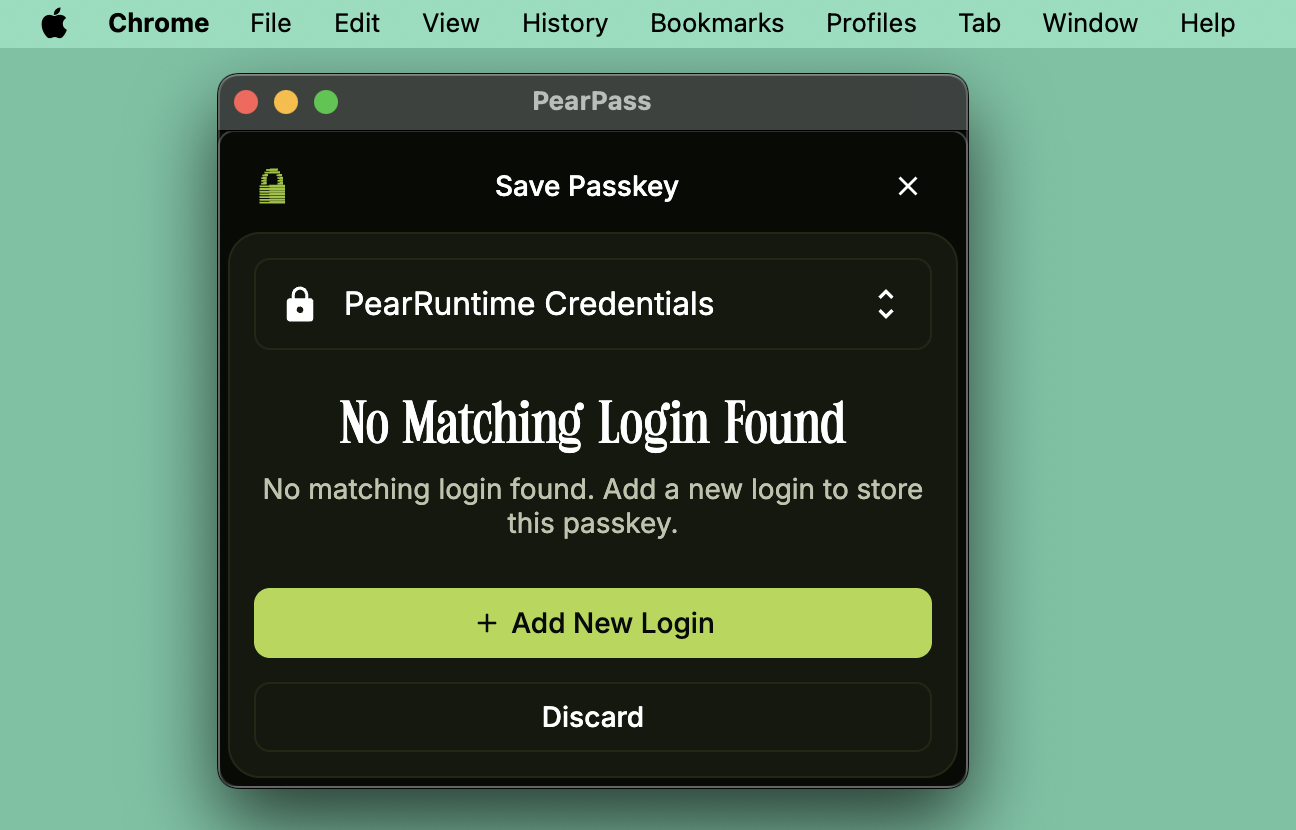
Select a vault
In the Save Passkey dialog, use the vault dropdown to select the vault where you want to save the passkey, then click + Add New Login.
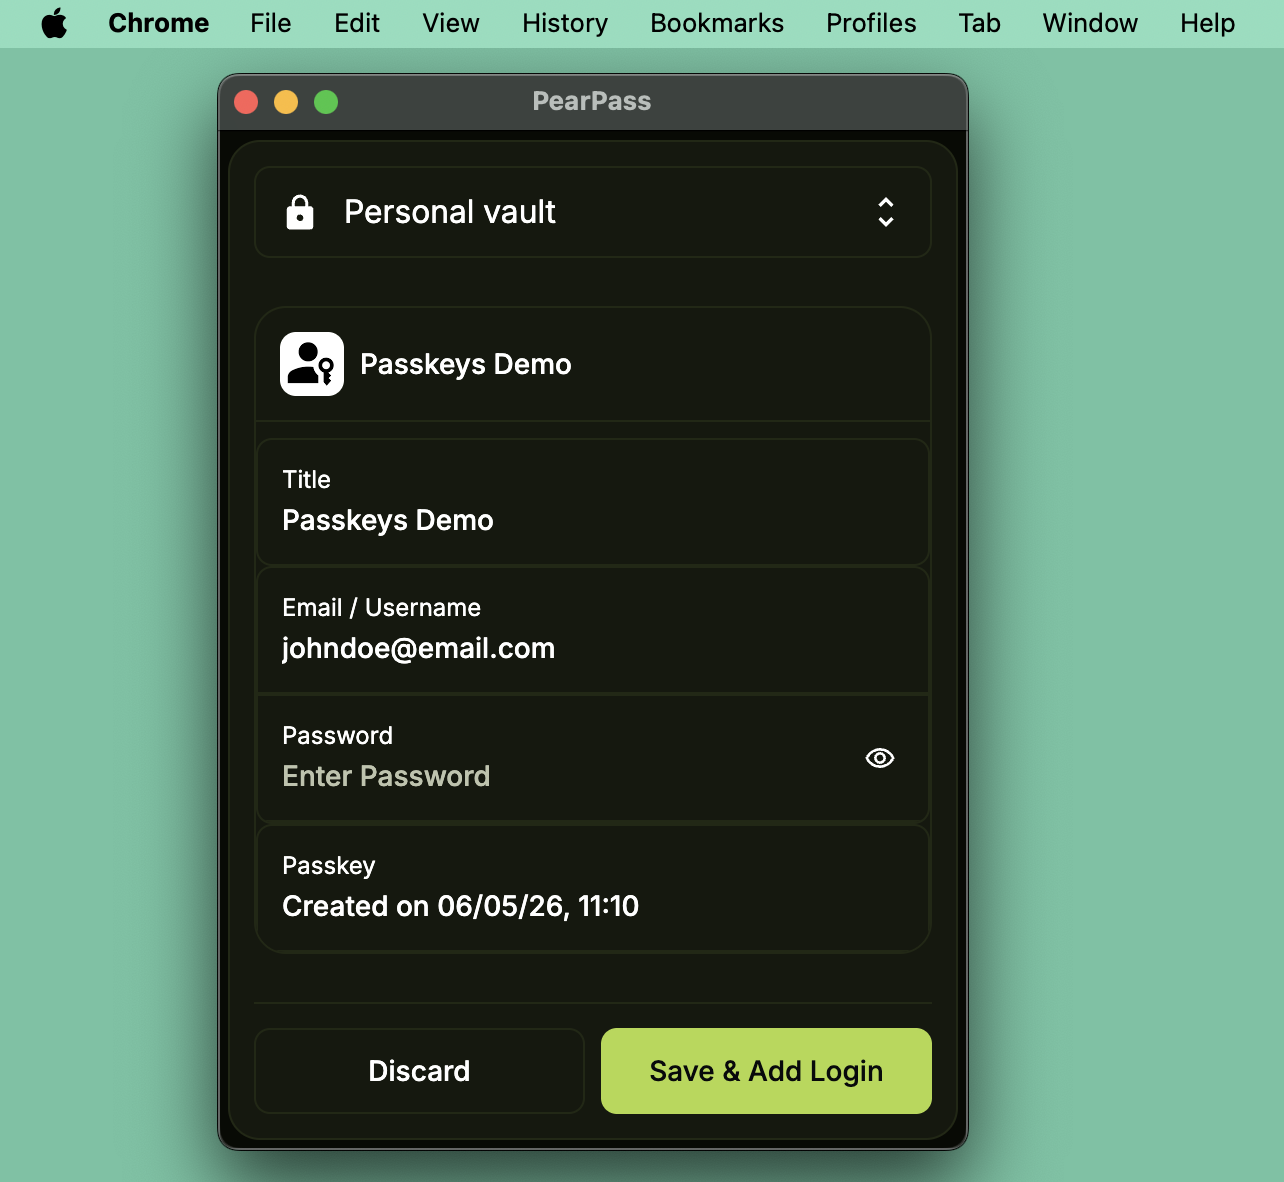
Review and save
Review the login details, then click Save & Add Login.
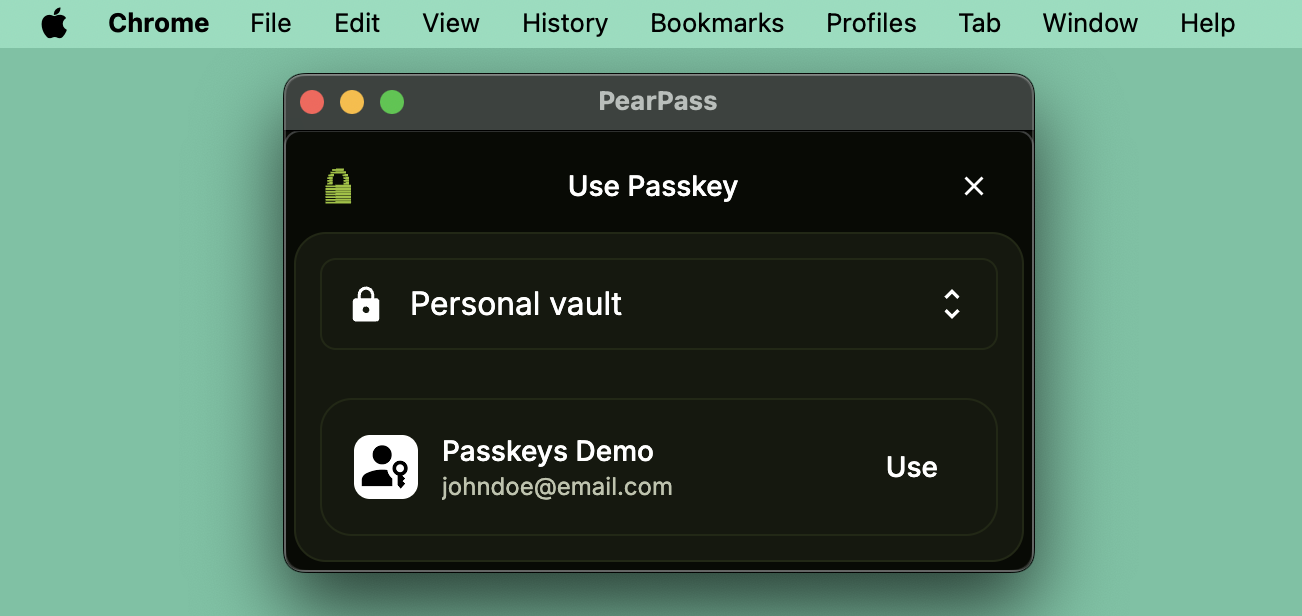
Log in with a passkey
Open the login page
Go to the login page of a website where you have a saved passkey. Follow the passkey sign-in flow.
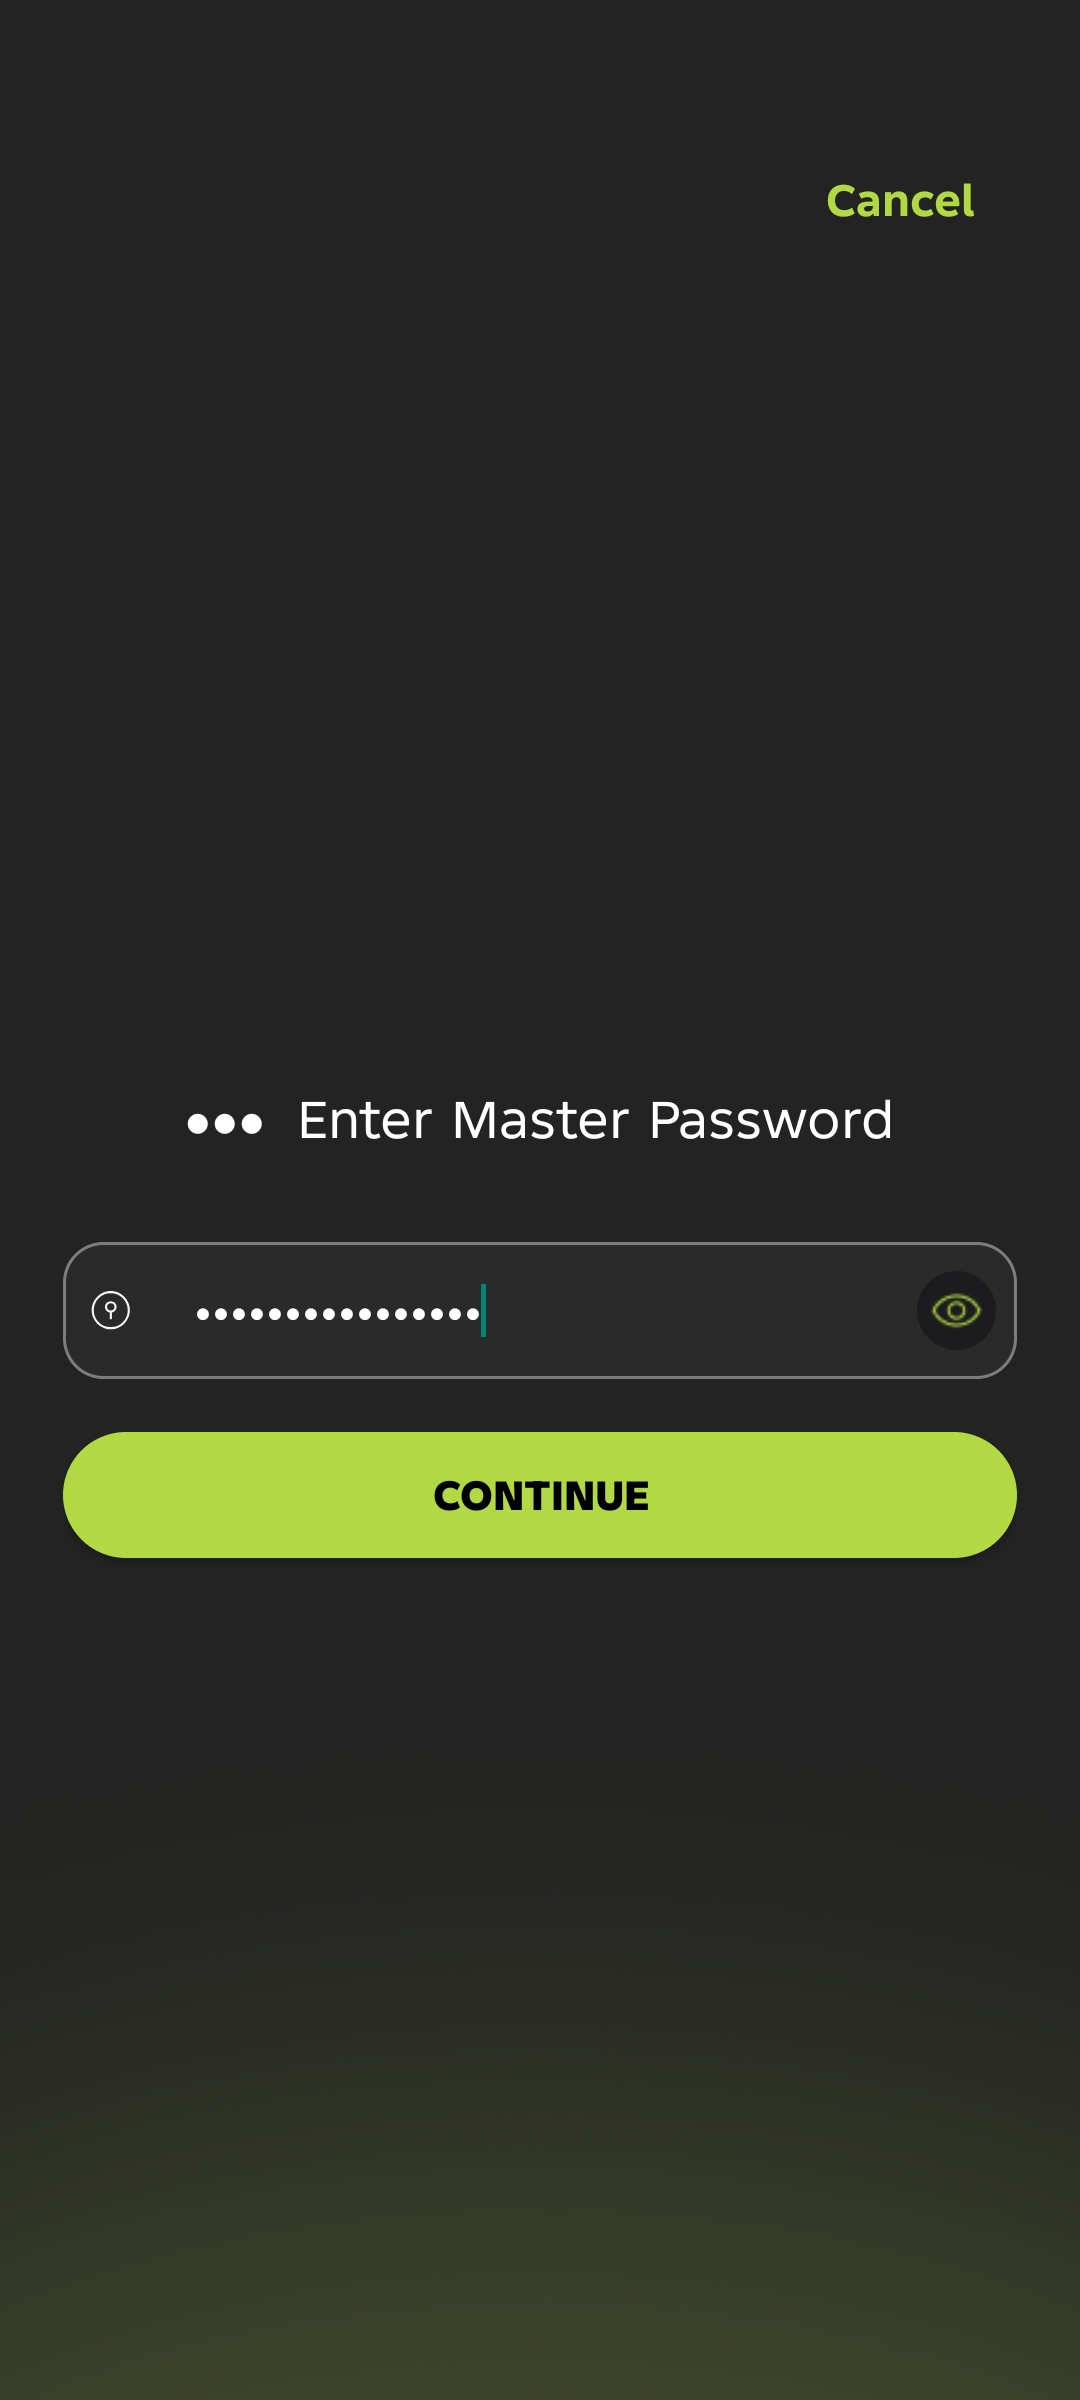
Enter your master password
Enter your master password and click Continue.
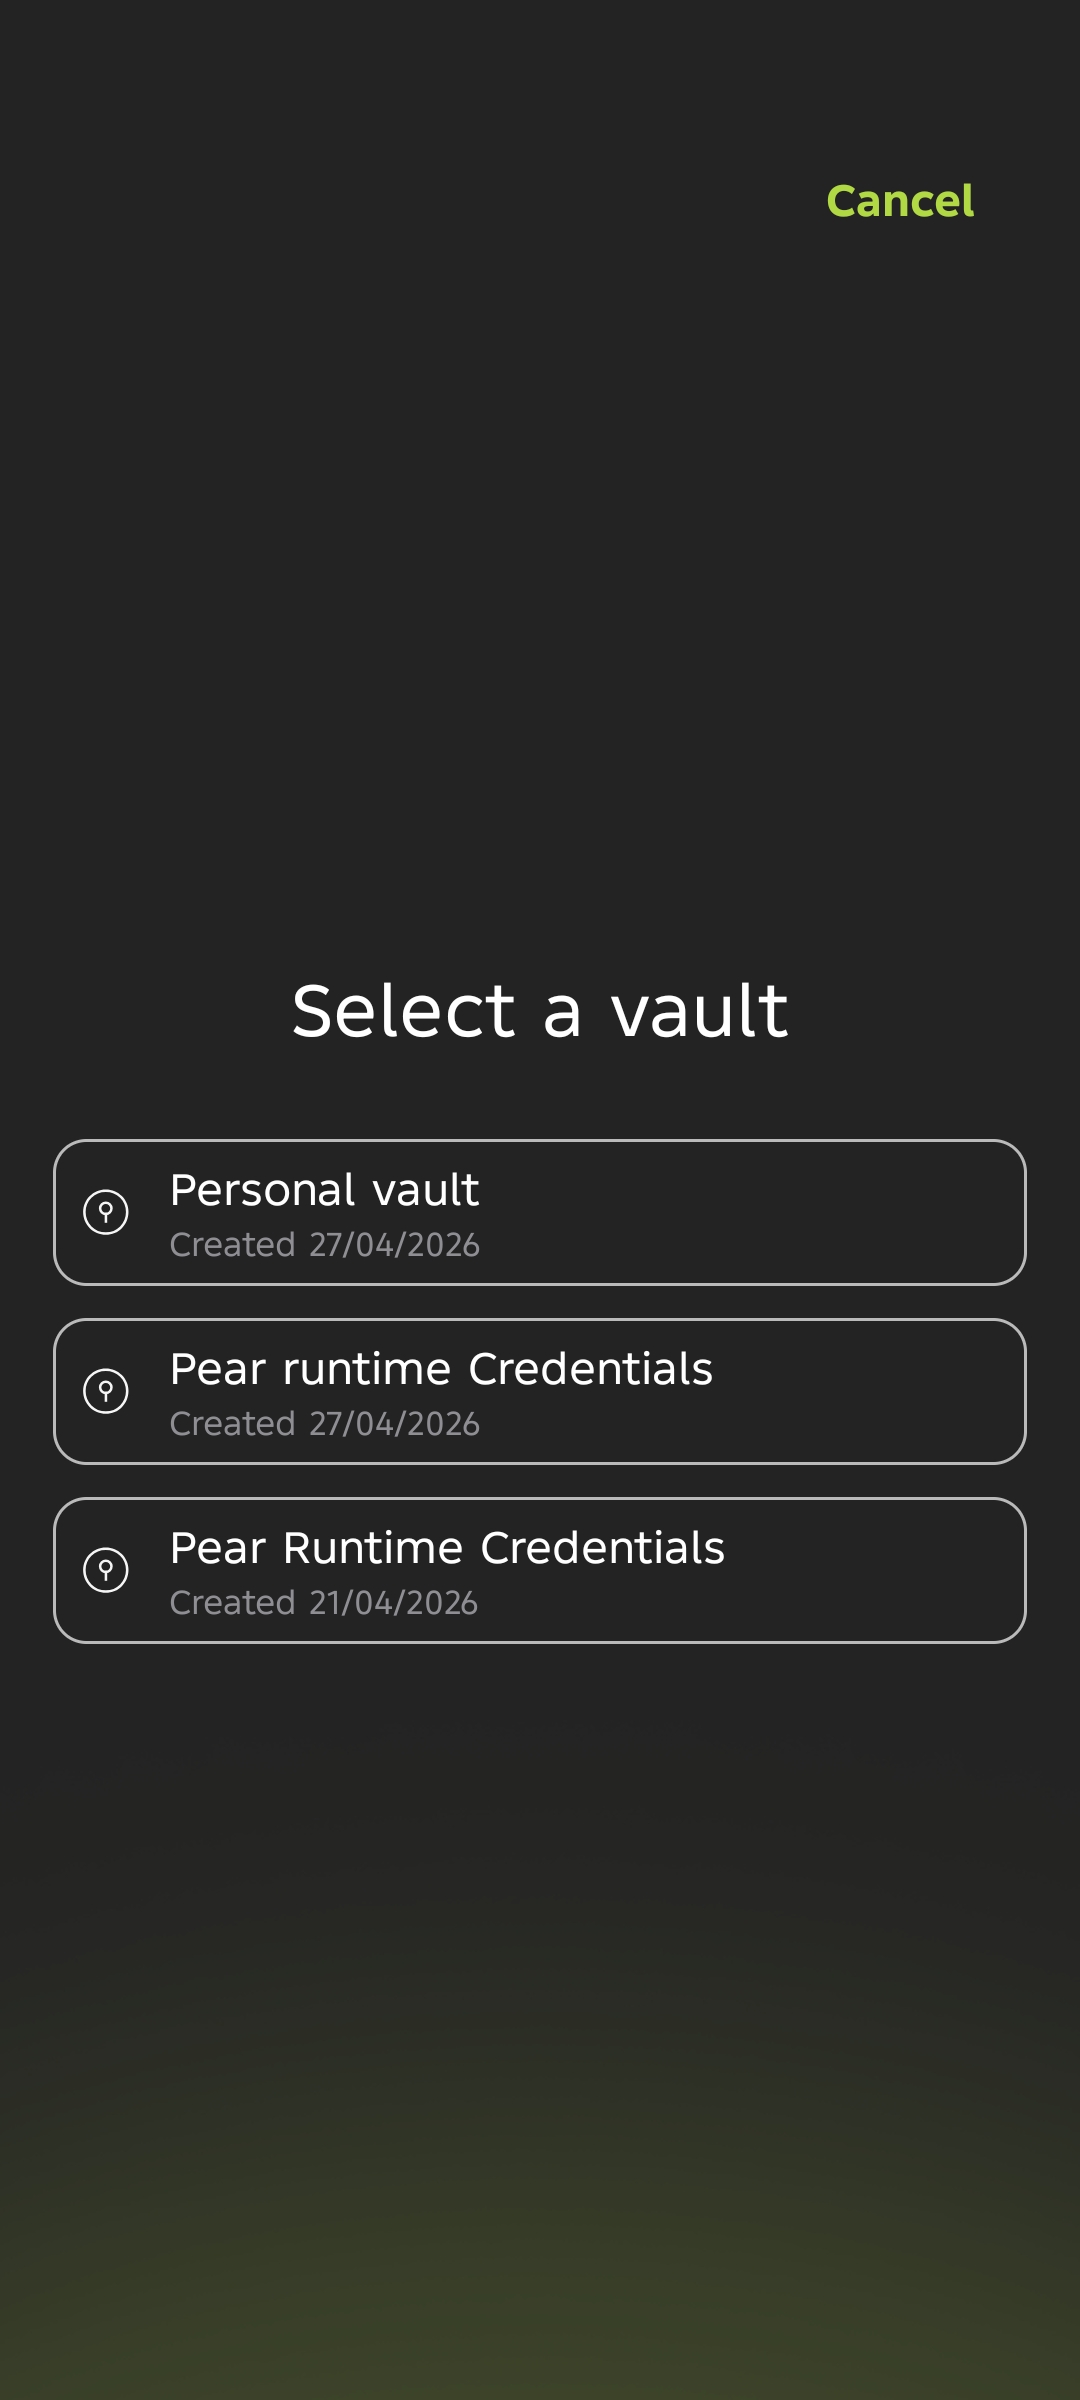
Select a vault
Use the vault dropdown to select the vault that contains your passkey.
Select your passkey
In the Use Passkey dialog, select the passkey for the current website and click Use.
Save a passkey
Start passkey creation on the website
On a website that supports passkeys, start the passkey setup flow. Follow your device prompt and select PearPass.
Unlock PearPass
Enter your master password and tap Continue.
Select a vault
PearPass displays your available vaults. Tap the vault where you want to save the passkey.
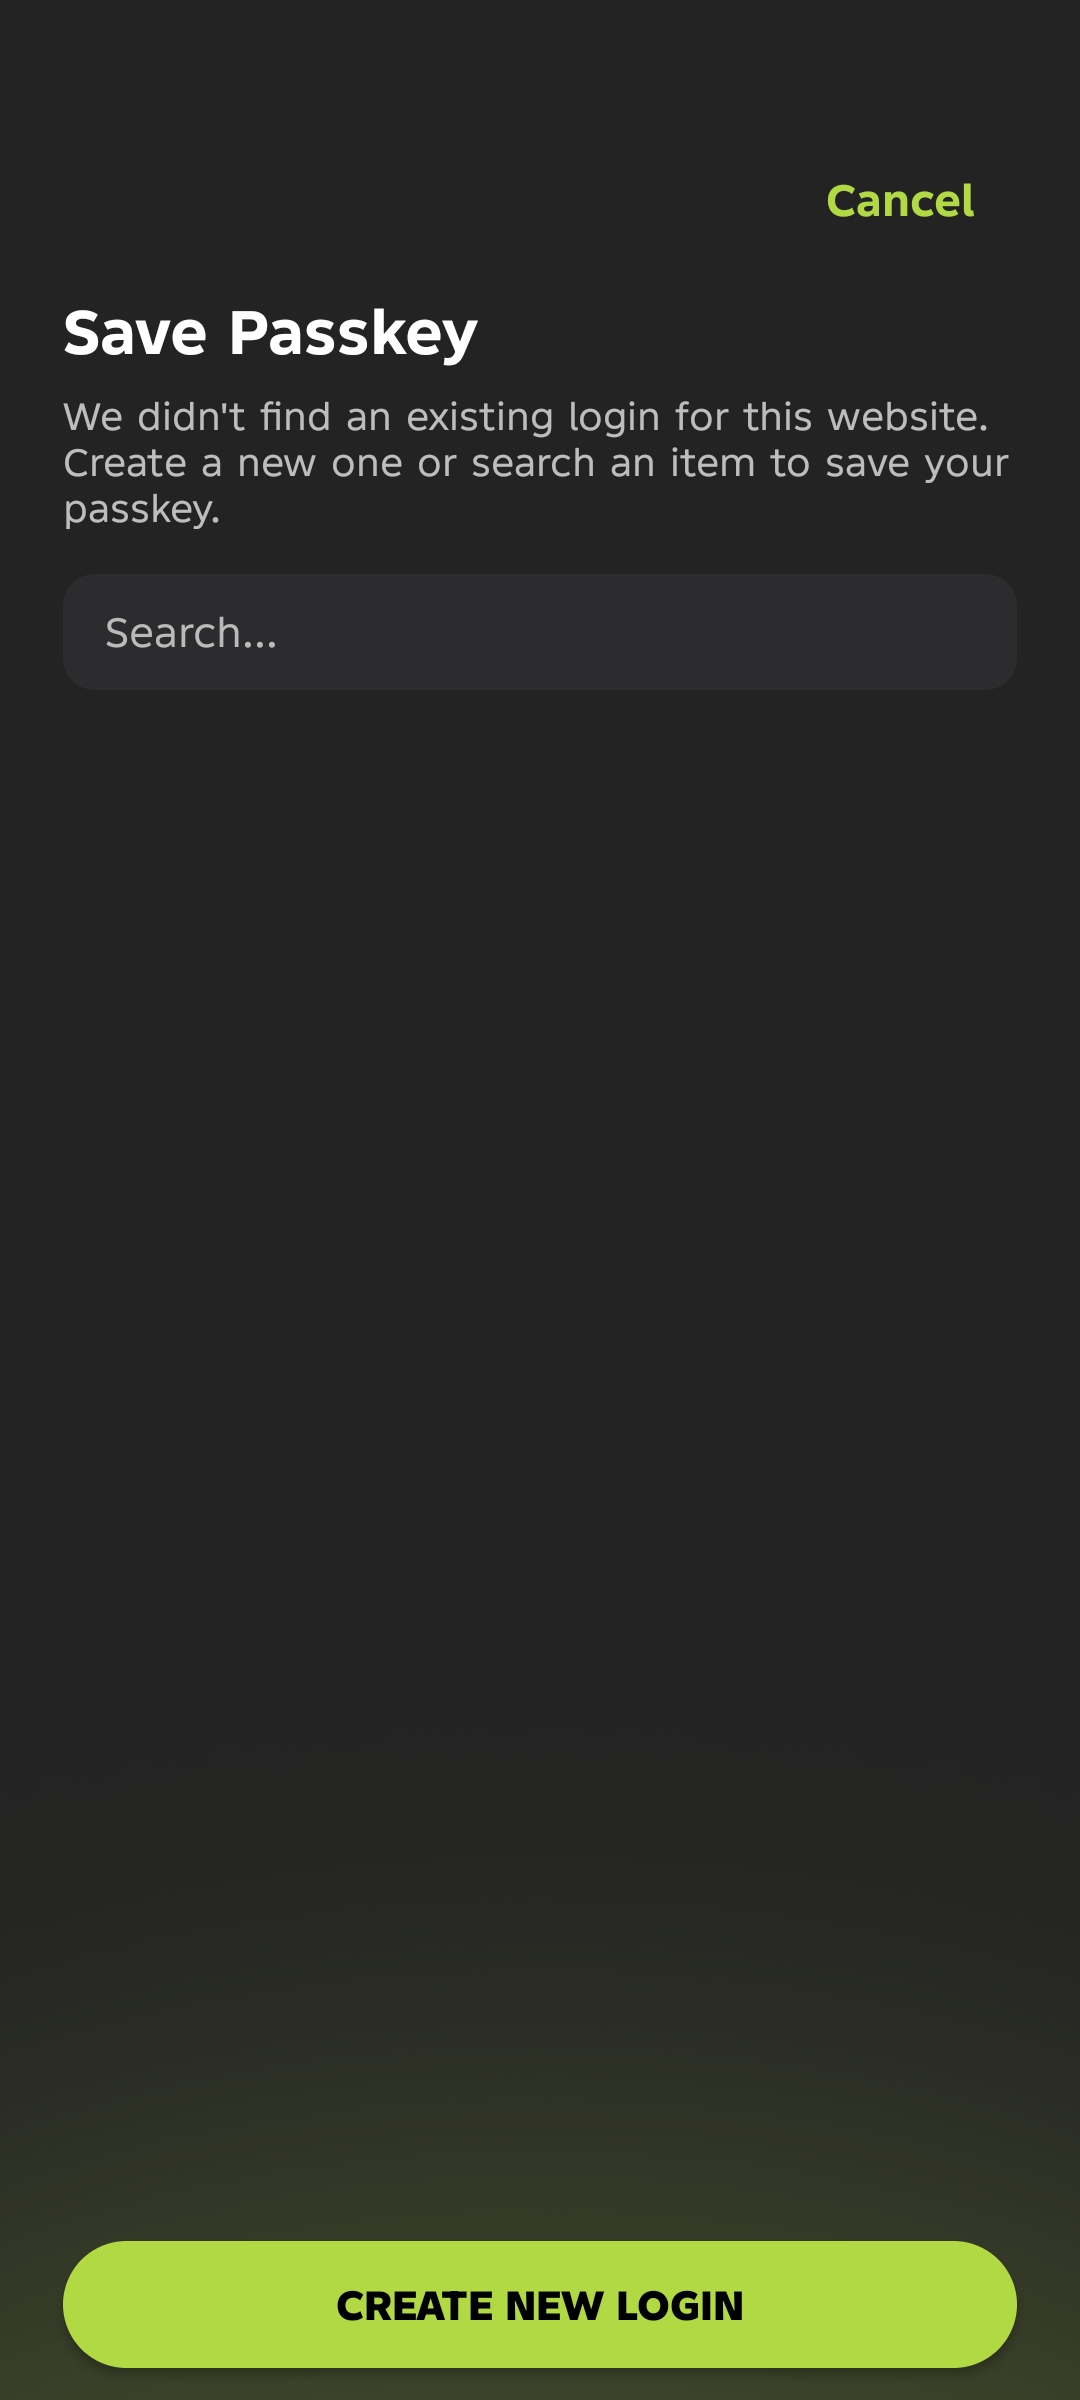
Save the passkey
Tap Create New Login.
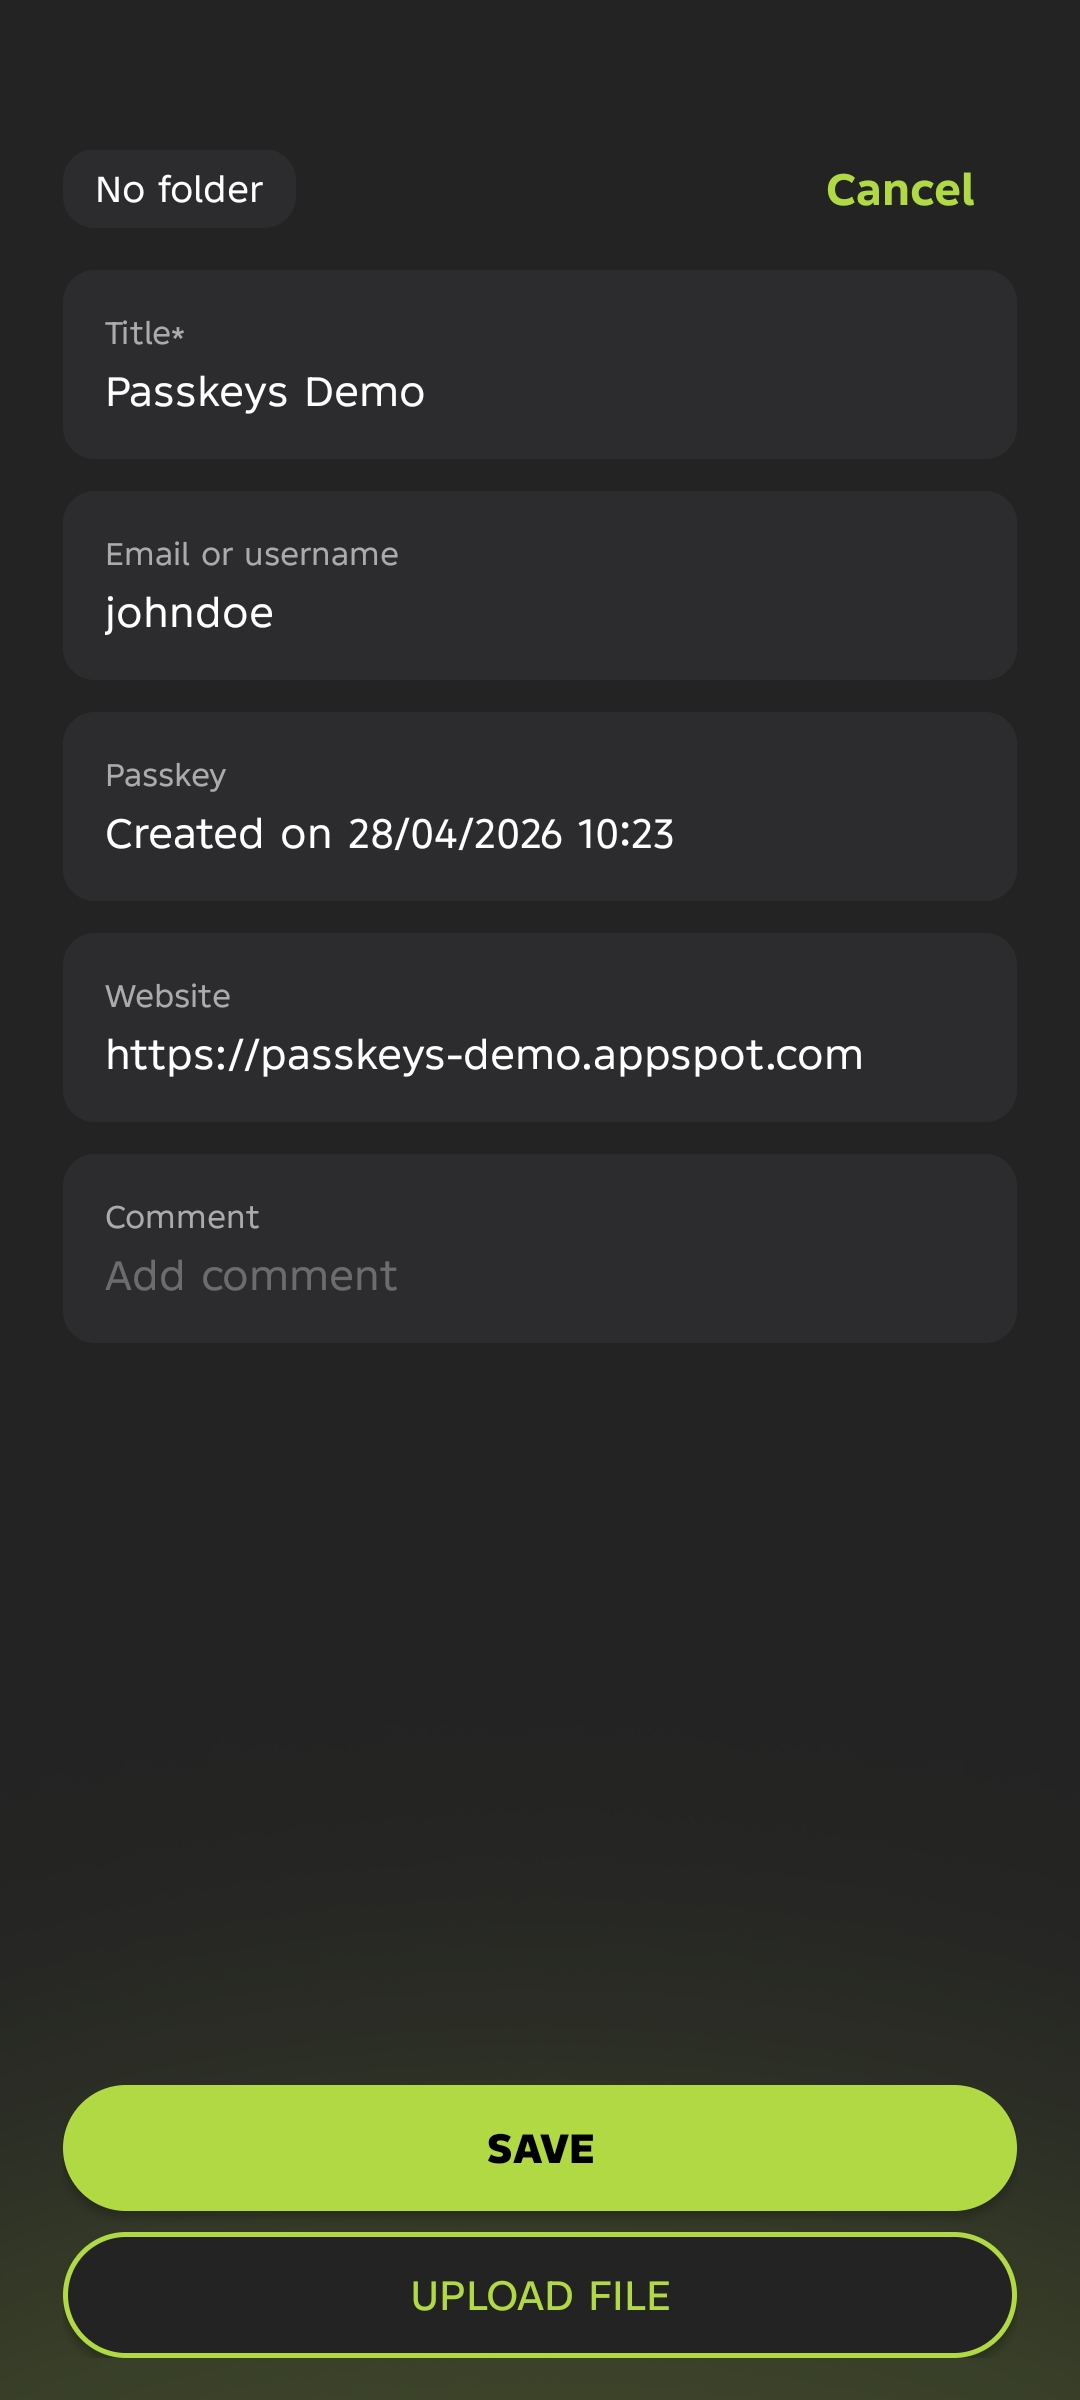
Review and save
PearPass fills in the login information. Review the details and tap Save. PearPass saves the passkey to your vault and returns you to the website.
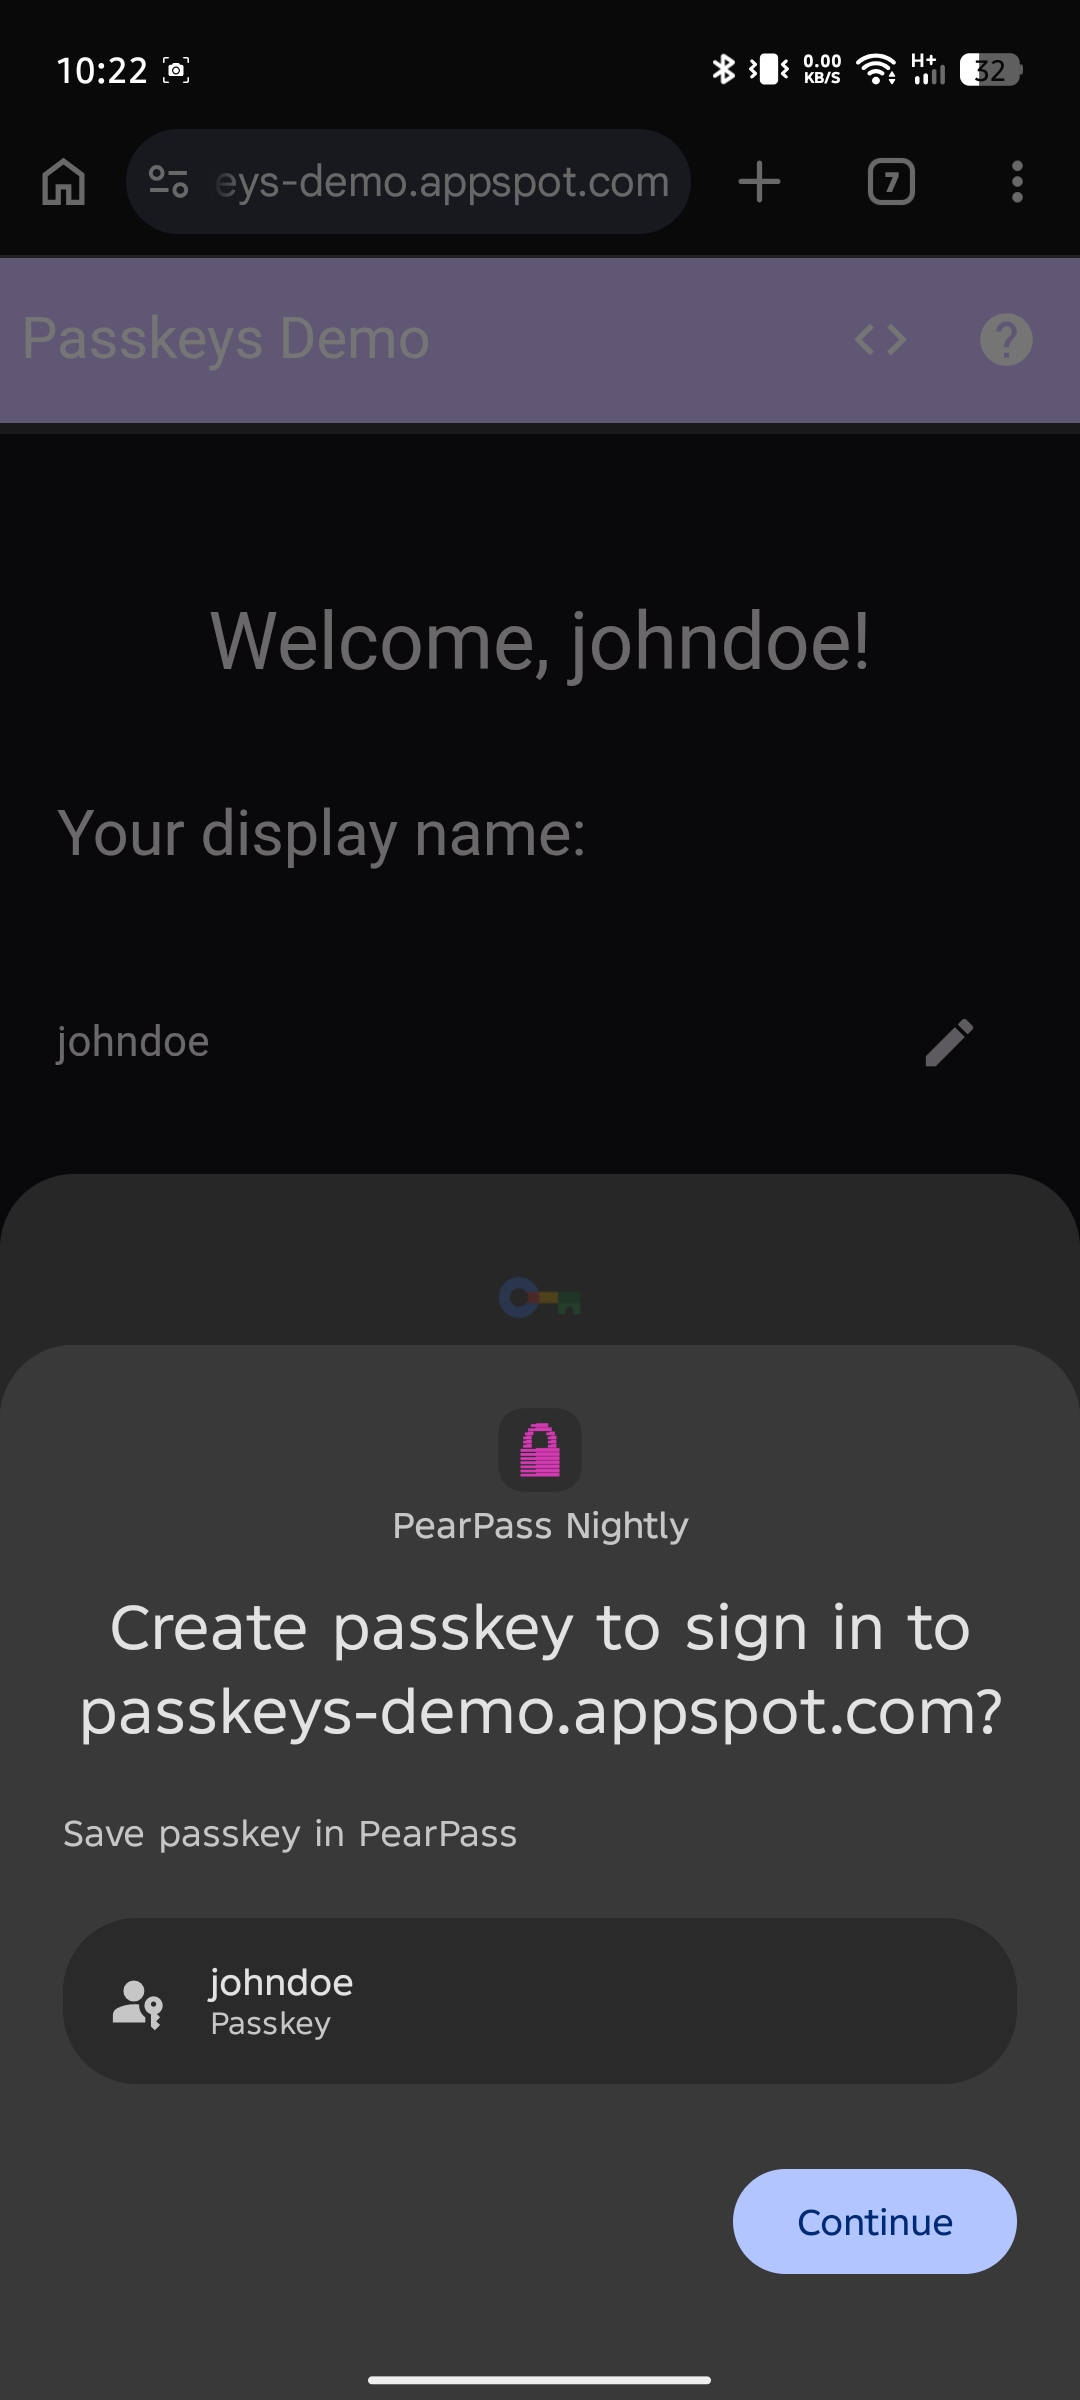
Log in with a passkey
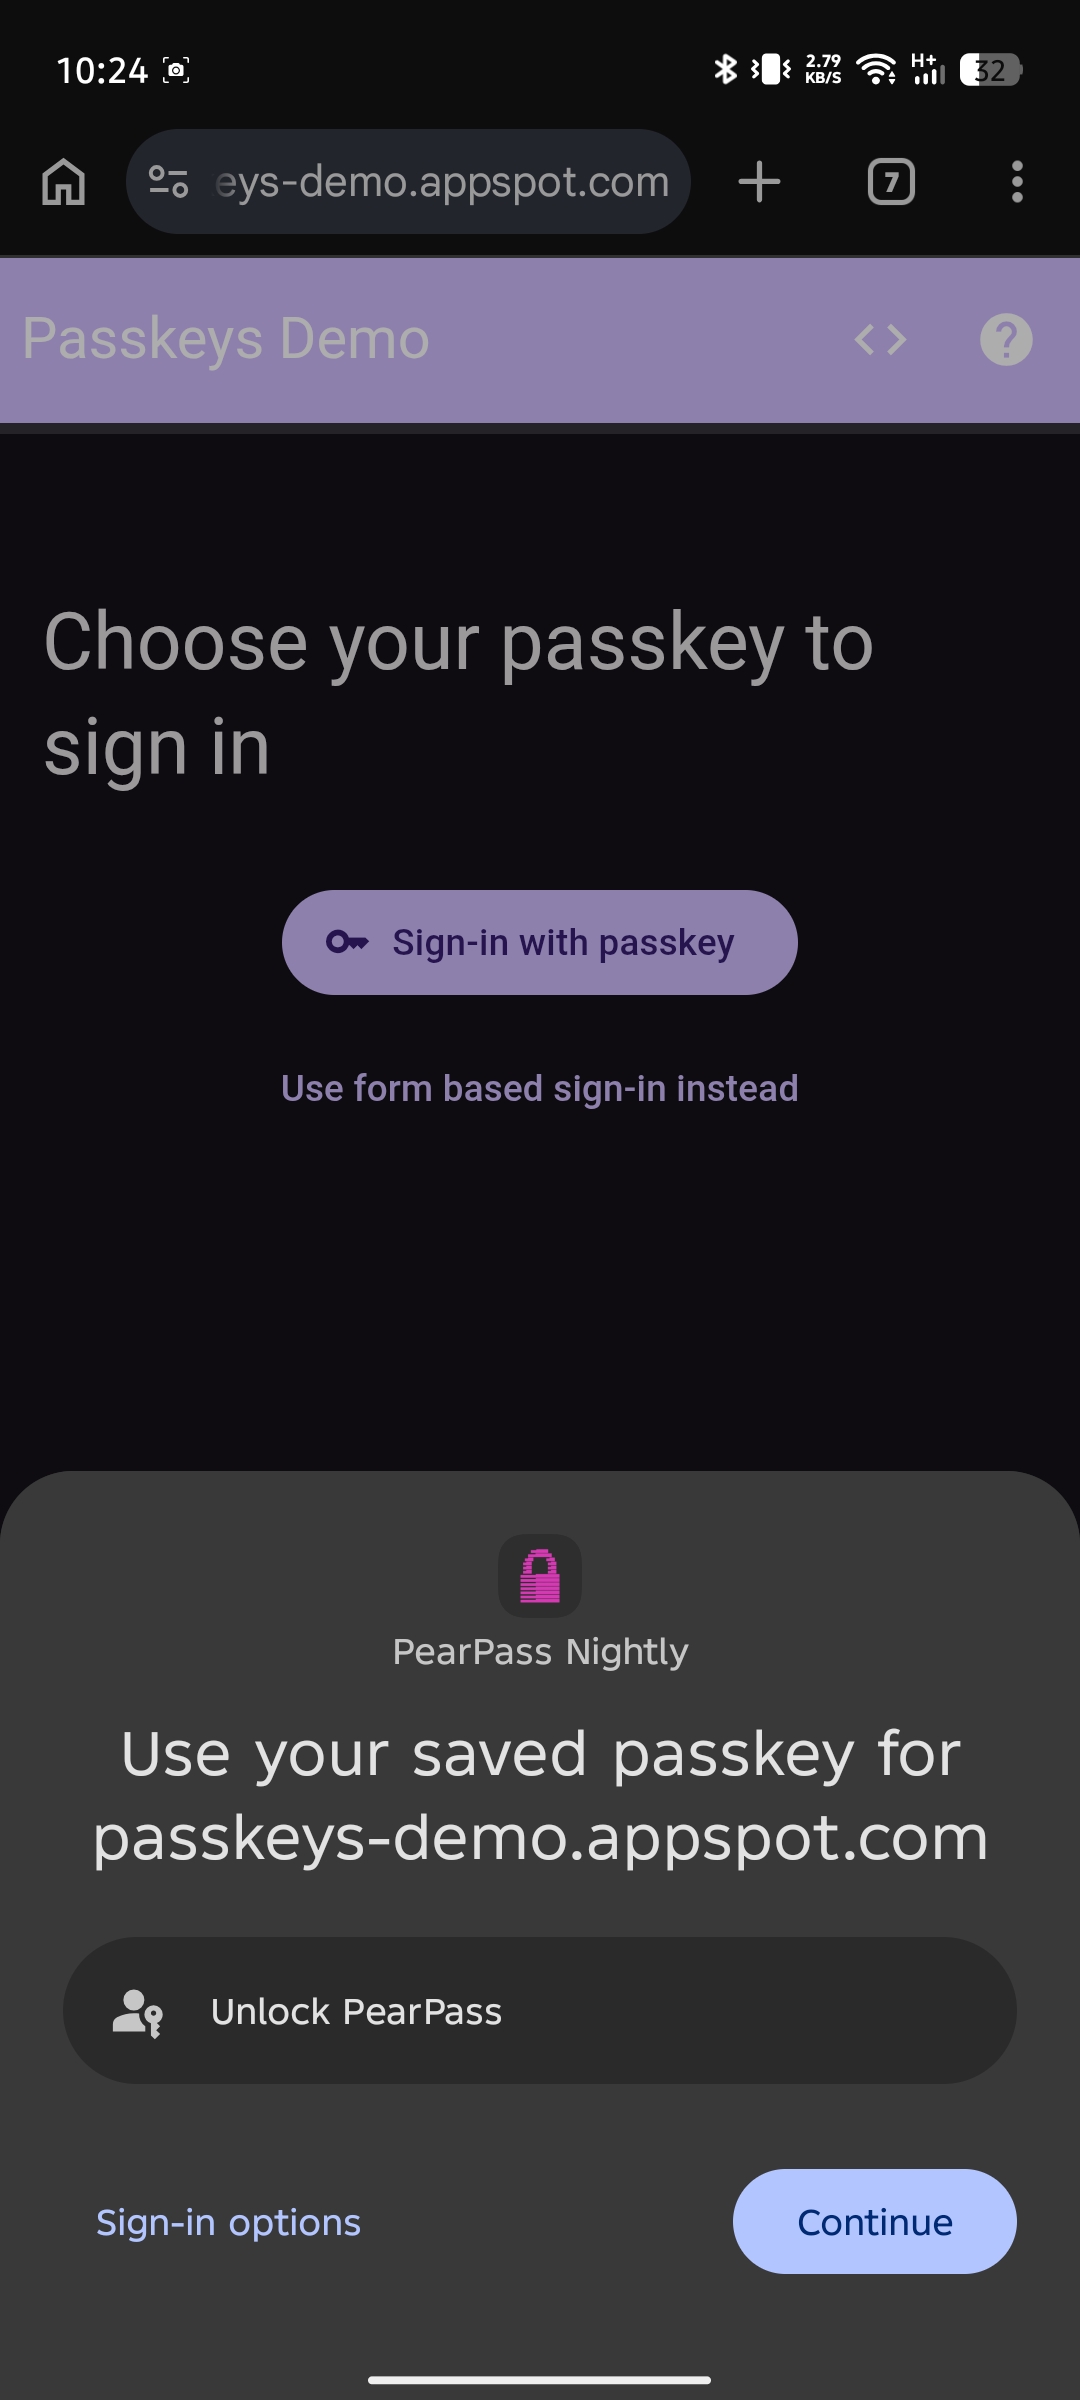
Open the login page
Go to the login page of a website where you have a saved passkey. Follow the website's Log in with passkey flow. When the system passkey prompt appears, select PearPass.
Unlock PearPass
Enter your master password and tap Continue.
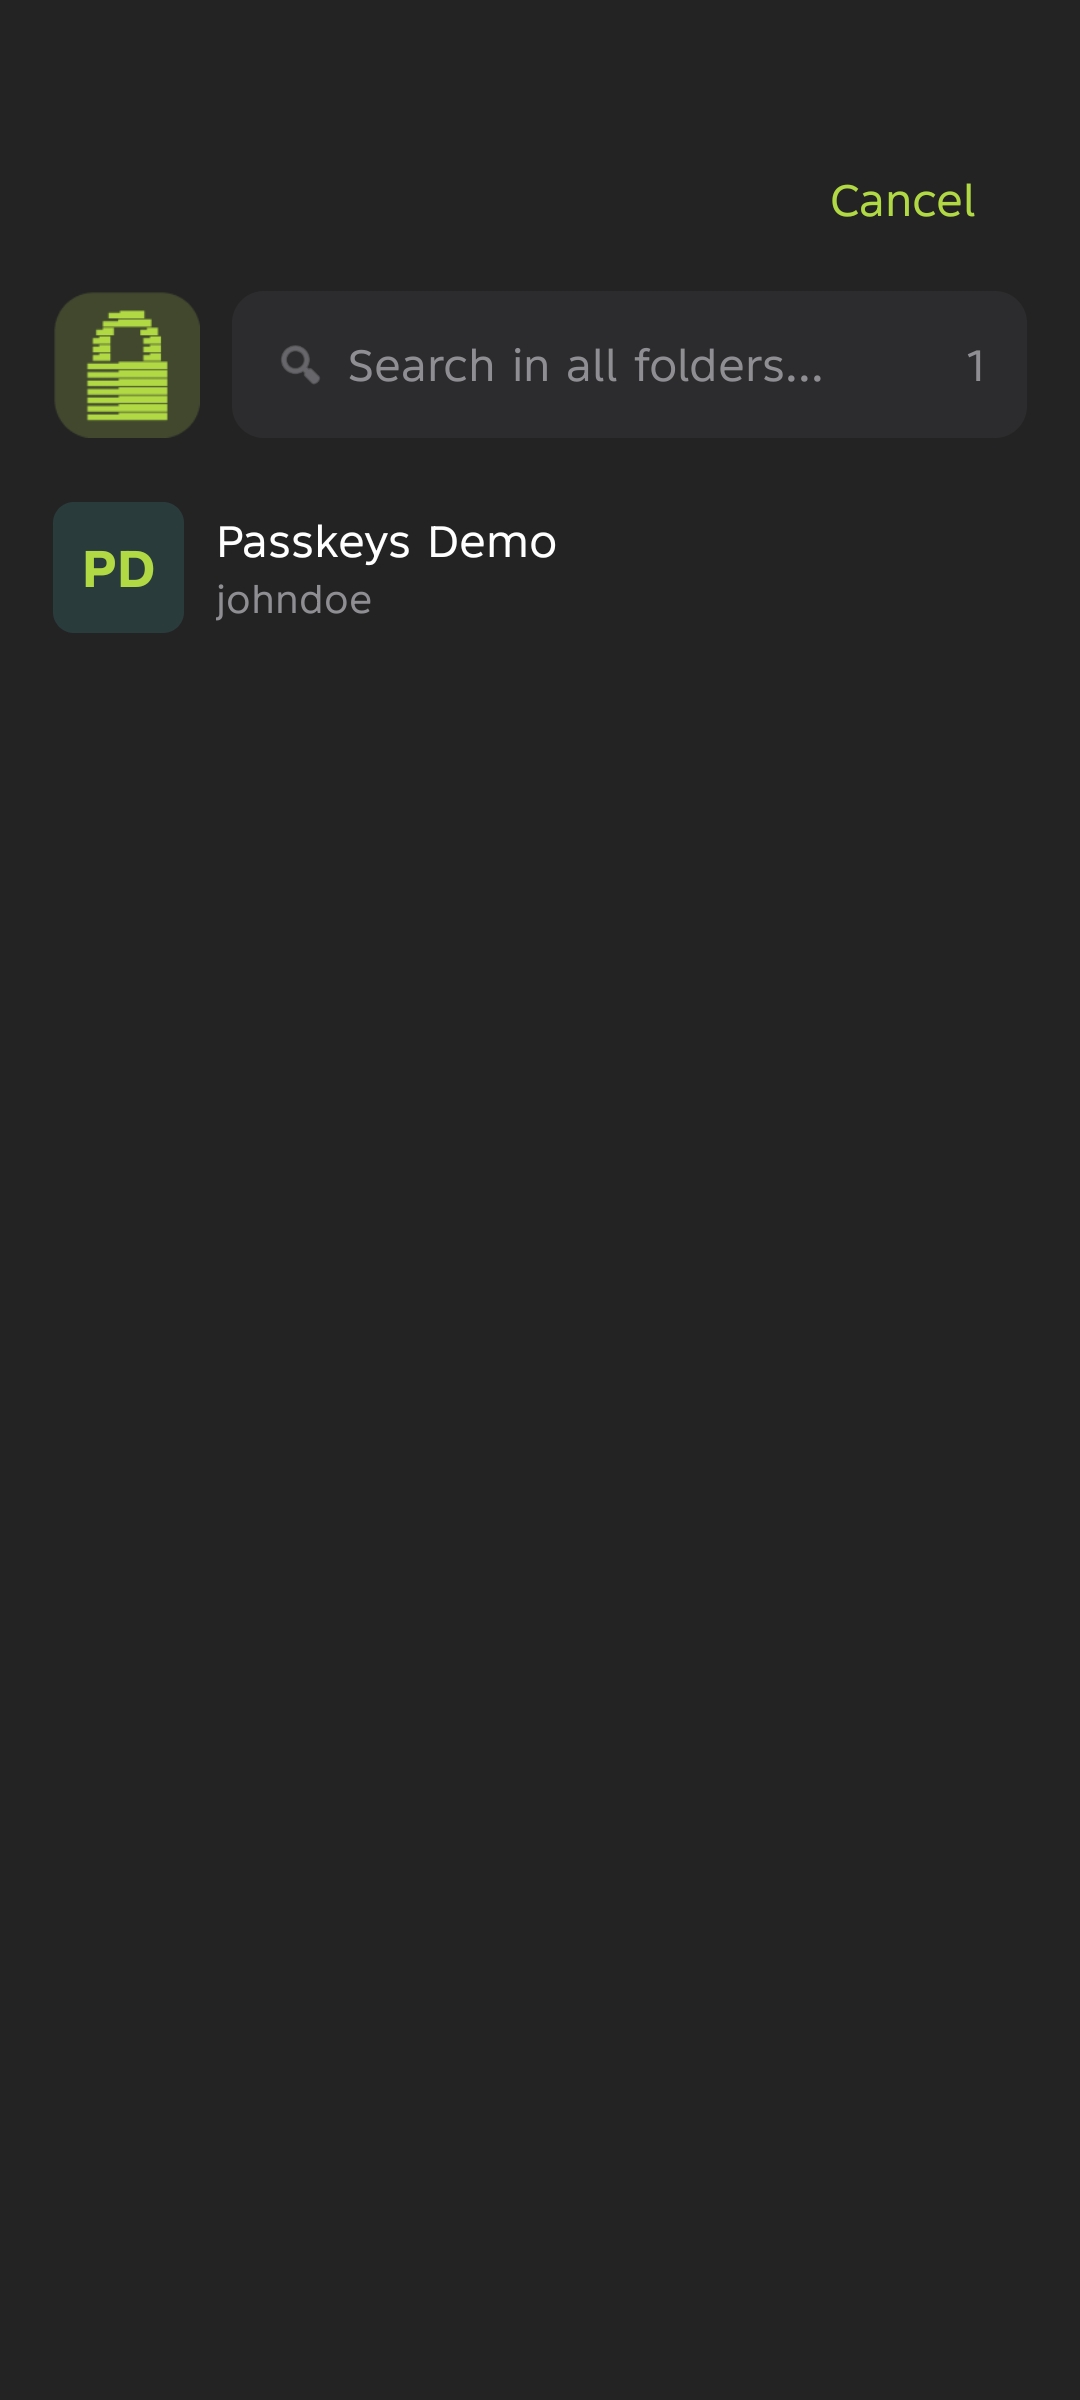
Select a vault
PearPass displays your available vaults. Tap the vault that contains the passkey.
Select your passkey
PearPass displays your saved passkeys. Tap the passkey for the current website to sign in.